Thursday, 28 June 2018

Behind the Lantern glass...


If you're a fan of the orange space suits you've all seen that the lantern has a milky glass and a light blue light inside. But most who'v seen the show may not have notices there's something behind it.


 See the mesh pattern?


I got a fine mesh aluminium sheet with stamped grill mesh holes from a local hobby supplier, then I modeled it to see how it would look. The pattern is actually oriented the other way, 90 degrees turned sideways in the screenshots above so I'll change that in the model.

In front of this I'm using a white screened plastic sheet you get with the Procap Helmet outer welding visor. I'm guessing Milennium got that part with the helmets and used it.

I'll get some photos of it when I can but here's the model at least and it shows the idea of how the mesh is used.

I've been thinking a lot about how to make the bellows.
Then the other day I noticed this detail on one of the screenshots from Kill the Moon I'm working from.


Can't see it? Let's take a closer look at Capaldis Helmet.


Is that... a seam? Or a patch of a rip perhaps?
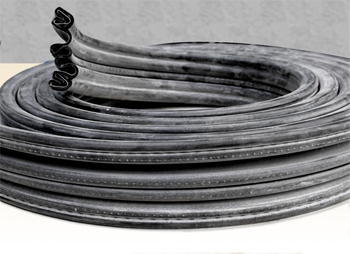
Anyway, if the originals have a patch or seam like that then I could use something that I join at the back. Like an accordion boot from this supplier: 


So I ordered some to try out. These things aren't cheap but at least I could buy per feet and not a ton of it I'll never use. ;)

Now, let's get back to the area at the back of the helmet again.


When they moved the air coupling at the back of the Procap helmet originally they left the slot for it open like this. Perhaps it lets air out as adding a rubber bellow hinders the normal overpressure way out through the stretchy liner under the jaw. It has to get out somewhere or air won't really circulate in the helmet.
I haven't posted here for a while because I was on a break from the project, but I started on it again recently so here's an update.

I made 3D mockup models of the helmet and visor to fit the parts to. They're not meant to look like the real parts for say printing as I have the real helmet used for the original prop but instead it's design support. That's why I only made the frame for the visor that meets the added parts.
This is common practice in Engineering CAD design and as it does there, it helped me a lot to find where and how some parts meet.


Because of that I've changed the shape of the ear pieces some to better correspond to the originals, mainly the lower line now meets the edge of the helmet instead of sticking out a bit below it.
I also lessened the thickness of the piece and the chamfers.


With that done I added the triangular... what are they, buttons at the back curve of the earpiece? 
I made the small nubs, they kind of look like Zoid nubs, don't they? :)

Then I started making the other plate inserts and the detailing on them, but it's only halfway done so far.


The hole where the curcular cross piece goes is left out here both because it's not fully finished and also to show I'm letting it be a secondary air passage, hearing aid hole and possible secondary backup fan system placement. 
I need to be able to wear and walk around in this thing all day on Cons. The cross will have a black filter fitted behind it. More to come on this when it's finished.